FinescrollsawScroll saw fretwork tutorials |
|
Scroll saw tutorial of the Medusa box |
|
In this section I show you more pictures of Medusa's box along with several pictures taken during its construction. These pictures do not intend to be an exhaustive account or complete instructions, just some comments that can be of interest. The box has 12 sides and a diameter of 27 cm (about 11 inches), though of course the pattern can be resized at will. |
 |
 |
 |
|
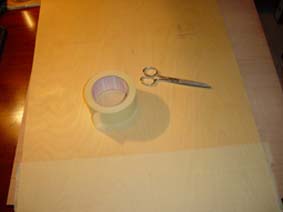
I use masking tape to transfer the pattern to the wood. It sticks strongly to the wood. Once the piece of wood is covered with the masking tape you can glue the pattern to the masking tape and proceed to cut the pieces. The wood used is 4 mm Baltic birch plywood. |
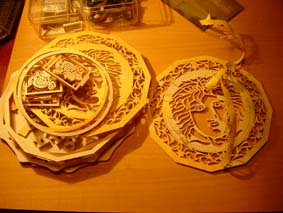
When the pieces have been cut the masking tape can be easily removed and leaves no residue at all, at least the one I found. In this case I did some stacking so I got some extra pieces for a future box, particularly the cover of the box, which has many holes. |
It is essential to check that all the pieces fit before continuing. |
 |
 |
 |
|
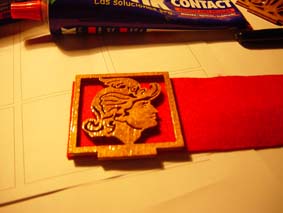
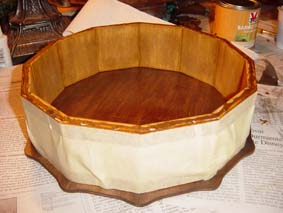
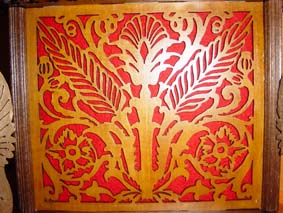
After dyeing the wood and finishing it with several sprayed coats of glossy polyurethane (or whatever you prefer), the back of the fretworked pieces is covered with a contrasting material, in this case red felt. Do not cover the fretwork pieces with felt to the top, leave a short distance uncovered in the upper side so that when the interior is covered with wood a groove is created. This groove is later filled with wood paste. |
Once the box is mounted the fretwork is covered with masking tape to preserve the felt clean of saw dust. The interior of the box is covered with pieces of wood. The height of these is the same as the height of the exterior pieces but the width depends on the thickness of the felt you have used. You have to measure accurately and do some sanding here. The groove in the border is filled with wood paste and sanded. |
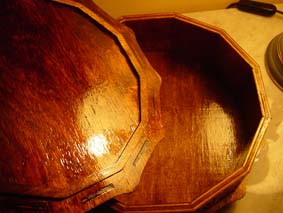
The interior of the box is then treated to obtain the finish of your preference, in this case with several coats of glossy polyurethane. |
 |
 |
 |
|
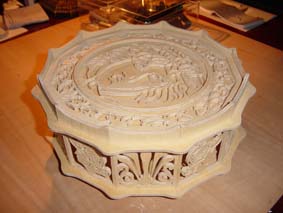
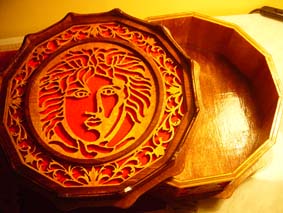
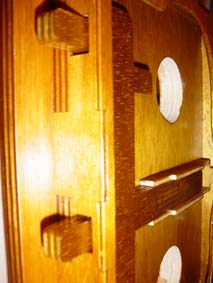
The cover is treated in the same way. The fretwork pieces are dyed in oak color and the rest of the pieces in walnut, to create a subtle contrast. |
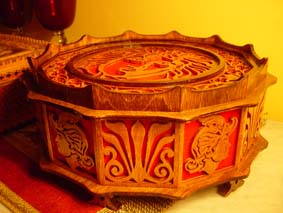
The soft texture of the felt creates a staring effect. |
The final aspect of the box can be seen here. |
Scroll saw tutorial of the Security box |
|
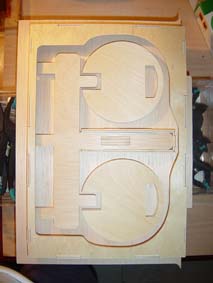
In this section I show you more pictures of the Security Box along with several pictures taken during its construction. These pictures do not intend to be an exhaustive account or complete instructions, just some comments that can be of interest. The particularity of this security box is that it is entirely made with wood, including the hinges and the lock mechanism. The wheels make for 1.000.000 possible combinations and only one opens the box. Precision cutting and assembling is of utmost importance in this pattern. The computer design pattern is perfectly accurate but minor mistakes can ruin the hinges or the rotating wheels mechanism. |
 |
 |
 |
|
The beginning is as always, transferring the patterns to the wood covered with masking tape and scrolling the pieces. It is essential to check all the pieces all the time, as they are cut and as they are coated. |
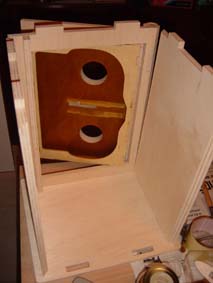
We check that the wooden hinges work properly and that the door fits correctly. |
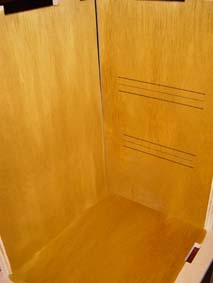
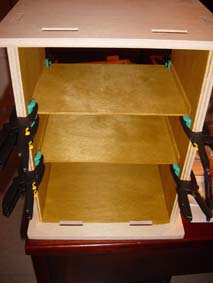
Mounting the shelves requires attention, since they do not have slots (these would make the sides of the box ugly). The position of the shelves is drawn in the sides of the box, being sure those lines will be covered. |
 |
The shelves are then glued to one of the sides and left to dry. |
 |
 |
 |
|
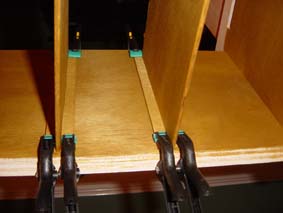
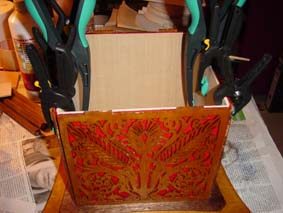
After some time the shelves are glued to the other side and hold in position with clamps. The base and top of the box are encased (but not glued!) so that the shelves dry exactly as they will be when the box is finished. |
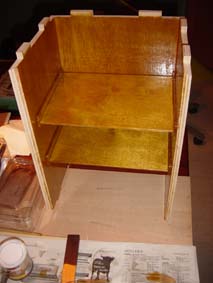
Once the shelves have dried the back of the box is glued in position, also encasing the base and top as before. The interior is then finished, in this case with oak dye, wood sealer and several coats of satin varnish. |
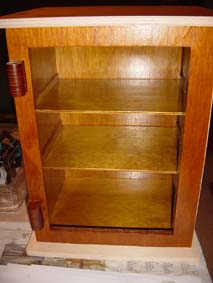
The front of the box is then glued in position and also finished. The top and base will be glued at the very end so the finishing of these pieces and the other sides can be left for the end. |
 |
 |
|
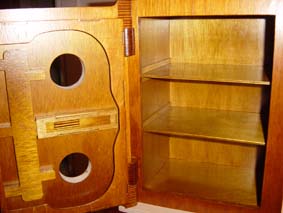
Again we check that the locking mechanism works fine (the wheels will be installed later). |
The only problem I found is with the hollow rods of the mechanism, they are slightly shorter than necessary. This happens because the thickness of the wood can have small variations. This minor problem has an easy solution, it is enough to cut one more piece for the rods in a thin wood (1,5 mm in this case), glue it and to sand until getting the exact length needed. |
 |
After all the care with the precision the results looks good and the pieces fit really well. |
Scroll saw tutorial of the Egg Clock |
|
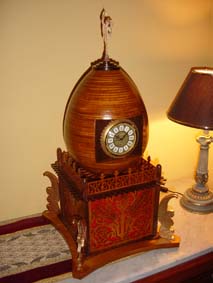
The egg clock scroll saw pattern is the result of my attempt to design a clock that could be made with a scroll saw but at the same time it should be very original. In this section I show you more pictures of the egg clock along with several pictures taken during its construction. These pictures do not intend to be an exhaustive account or complete instructions, just some comments that can be of interest. The main part of this clock is the egg, which is made of several dozens of slices. Every slice needs to be scrolled with a very precise bevel angle, determined for each one by the computer. When glued together these slices form the curved surface of the egg. The base of the clock contains a very elaborate fretwork. |
 |
 |
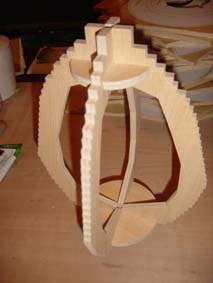
| The first step to make the egg is to mount the six pieces that form its frame. Then the slices are easily glued one after the other just by gluing and encasing them in their position until completing the whole body. | The surface of the egg formed by the edges of the slices is then sanded and finished with two coats of wood sealer and several coats of varnish. |
 |
 |
 |
| The rest of the clock has no particular difficulty. The interior of the base can be covered with scrap wood for better protection of the felt we use to linen. | The corner columns are added and the fretwork is protected with masking tape. These rods of wood are found in most wood suppliers. | If the joint of two pieces leaves a too visible crack it can simply be covered with wood paste. Cover the pieces with masking tape leaving just the crack and apply the paste with a shoveler. Then remove the tape and the problem is solved. |
 |
 |
 |
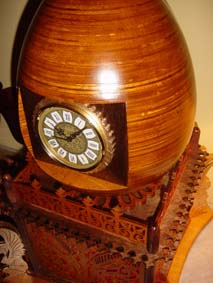
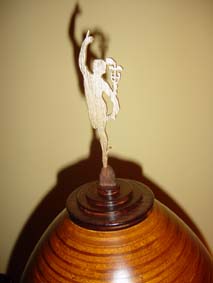
| The finished clock looks really nice and special, very original. | The surface of the clock is perfectly curved and shines due to the satin varnish. The horizontal lines show how it is really made with slices of wood, giving it a particular beauty. | A closer front view. |
 |
 |
 |
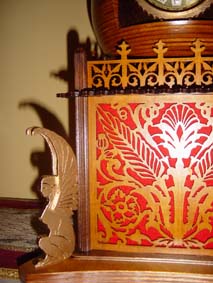 |
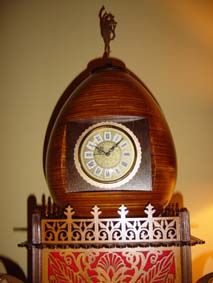
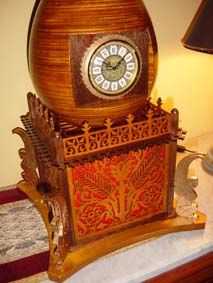
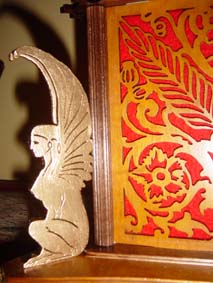
| Observe how the felt behind the fretwork seems to shine with its own light. | The golden figure on top of the egg is Mercury flying (messenger of the gods and a deity of trade, travelers and wealth), based upon a famous sculpture by Giambologna. It can be left unglued for easier and safer transportation. | On every corner a golden winged sphinx guards the clock leaning on the column. The wings of the sphinxes can be glued more open if desired. | Observe the beautiful contrast created by the red felt, the gold of the sphinxes and the clock and the two tones of the wood. |
 |
 |
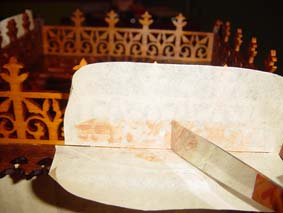
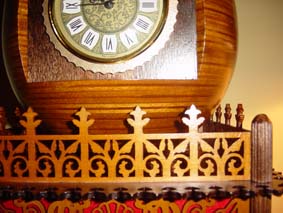
| Detail of the fence around the egg. |
Detail of the fretwork. Please note that this pattern is registered and copyrighted. If you would like to have it I offer it for 16 € plus shipping. The pattern is computer made, which provides total precision, and nicely printed for convenient scrolling. Click here to buy this pattern. Write me to [email protected] for any questions. |
Scroll saw tutorial of the Eiffel Tower |
|
In this section I show you more pictures of the Eiffel tower along with several pictures taken during its construction. These pictures do not intend to be an exhaustive account or complete instructions, just some comments that can be of interest. |
 |
 |
 |
|
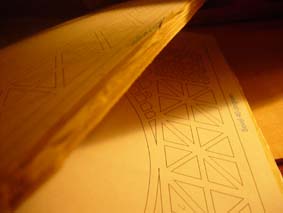
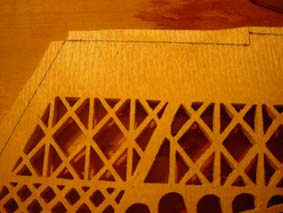
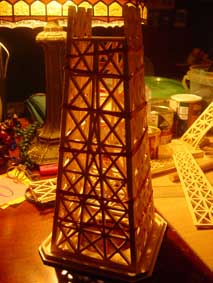
I use masking tape to transfer the pattern to the wood. It sticks strongly to the wood. Once the piece of wood is covered with the masking tape you can glue the pattern to the masking tape and proceed to cut the pieces. The wood used is 4 mm Baltic birch plywood. I have stacked in groups of two. The stacked pieces are just glued in the sides. |
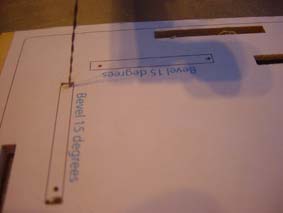
The slots of the floors of the tower must be beveled in a particular way: the short sides are not beveled and the long sides are beveled in the same direction. To achieve this, both extremes of the slot are cut in first place with a round blade. With the round blades the extremes can be cut without turning the piece, which is maintained at the desired bevel angle. Using a flat blade, the two long sides are then cut both of them in the same direction. |
Stacked pieces need to be separated before scrolling their beveled sides. Before separating them we make small marks with the blade. |
 |
 |
 |
|
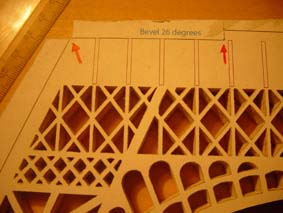
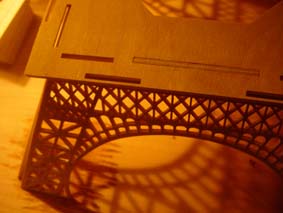
We then separate them, and using a ruler, we complete the shape of the piece or pieces below the main one. We then proceed to scroll all the beveled sides. This method is not valid for those sides of the pieces that are not straight lines. We'll see an example of such situation later. |
The pieces of the first section are done and we check they fit well. The inclined sides encase exactly in the beveled slots so we simply have to glue them in position without further concern. |
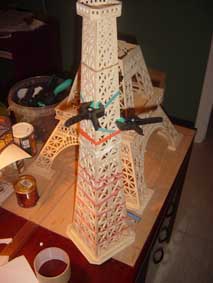
We firstly glue the four sides to their roof and let dry. Then we glue the corners one by one and hold them in position with elastic bands. |
 |
 |
 |
 |
|
The sides of the pieces corresponding to the third section of the tower are slightly curved. Once we have made all the inner cuts and the outside non beveled cuts we separate the stacked pieces, we finish the first piece and we use it as a pattern to draw the beveled sides with a pen in the second piece. We then finish the second piece normally. |
To glue the four sides of the first part of the third section we insert these sides in their base, apply glue and hold them in position with welts until they dry. We then glue the inside piece of this section. We proceed in the same manner with the second part of this section. |
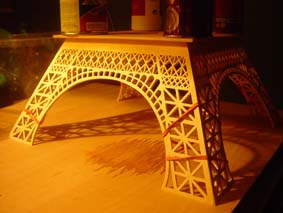
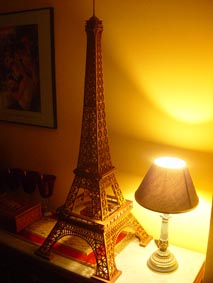
We then glue these two parts together to form the third section. We hold both pieces with welts as before. They fit with precision, the juncture is very difficult to notice. The corners are sanded slightly to give them a smooth aspect. The project is then mounted and finished as you prefer. A few pictures of the finished project follow. |
The finished project calls the attention of everyone. |
|
© Copyright 2024 Pedro López Rodríguez. All rights reserved. |